How to cut out object with Adobe Photoshop

Learn how to make a rough selection of your subject and their hair, and then refine that selection using the powerful tools within Select and Mask. She has curly hair, so it will be a bit tougher than straight hair.  This technique also works on fur.

1. The selection

Grab the quick select tool from the toolbox.

Rather than select our subject, we will select the background because it’s simpler. (If it was a complex background, select our subject instead. Here is a tut for cutting out against busy backgrounds) Drag your quick select tool over the area to select it. If you go too far, Alt/Option, drag to deselect areas.

When everything is selected, we need to inverse the selection so that our subject is selected. Choose Select>Inverse or Cmd/Ctrl+Shift+I.

2. Select and Mask

Click on Select and Mask from the top toolbar, this will take you into the Select/Mask workspace.

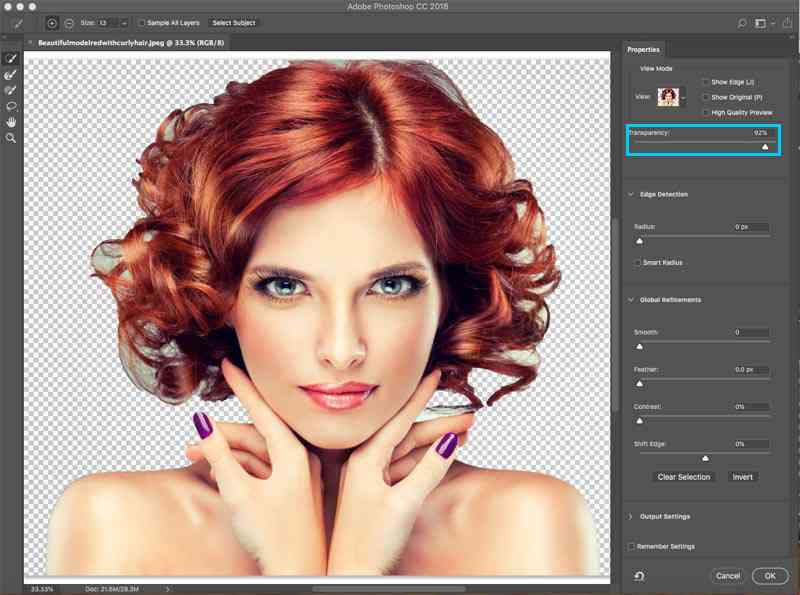
Increase the Transparency so that you make the background invisible. (This is just for preview purposes). Change the view to black or white, whichever shows the edge the best.

Grab the refine brush for the left toolbar. Paint over the areas of the flyaway hair. Make sure you get all the ends of the hair and don’t go too far into the image, you just want to get the edges, so you can tell Photoshop what is hair and what is the background.

You will notice as you refine, the entire selection gets smarter and the selection will get better.

Here is a secret weapon in Select and Mask when it comes to hair. Turn on Decontaminate colors. Immediately, the color fringing disappears. Change output to: New Layer with Layer Mask, Click ok.

And now we have a nice cutout